No prior MUGEN experience needed. By the end of this lesson, you'll have your own custom-built stage running inside MUGEN with a scrolling background and an animated torch and you'll understand every line of code that makes it work.
Before we touch any tools, here's the entire concept in a nutshell. If you understand these three things, the rest is just typing.
01
Some Pictures
A background image (sky, mountains, walls whatever you want). Maybe a few small extras like torches or banners. That's it. They're just regular PNG files you can draw in any program.
02
A Sprite File (.SFF)
All those pictures get bundled into ONE file called an .sff. We use a free tool called Fighter Factory 3 to do this like zipping a folder.
03
A Config File (.DEF)
A plain text file that tells MUGEN: "use this picture here, that picture there, the camera goes from X to Y, players spawn here." That's the file we'll spend most of today learning to read and edit.
1
🎮
What's a Stage?
Understand how MUGEN stages work before touching any tools.
Active
When you pick a stage in MUGEN, the dojo, the rooftop, the boss arena, you're not actually playing inside a 3D place. You're looking at a stack of flat pictures arranged at different distances from the camera.
The picture furthest away (the sky, distant mountains) barely moves when fighters walk left and right. The picture closest (foreground bushes, fence posts) moves a lot. Your brain reads this difference in speed and thinks "ooh, depth!" even though everything is flat.
This trick is called parallax scrolling, and it's been used in 2D games since the 1980s.
The good news for total beginners: your first stage doesn't need parallax at all. You can make a working MUGEN stage with literally one background picture. We'll add the fancy stuff once you've got something running.
Things every MUGEN stage needs:
A folder inside MUGEN/stages/
A .def file (the config, plain text)
A .sff file (your bundled artwork)
One line added to MUGEN/data/select.def so MUGEN knows it exists
That's literally it. Four things. Let's go get them.
✏️Fill in the Blanks+15 XP
A MUGEN stage is made of flat arranged at different distances. The trick of layers moving at different speeds is called scrolling.
🧠Knowledge Check+15 XP
How many files does a basic MUGEN stage need at minimum?
A1 file
B2 files (a .def and a .sff)
C5 files
2
📦
Get the Starter Pack
Download, unzip and open your first MUGEN stage file.
Locked
Scroll to the bottom of this page and download the My First Stage Starter Pack. It contains three files:
my-first-stage.def, the config file, fully commented in plain English
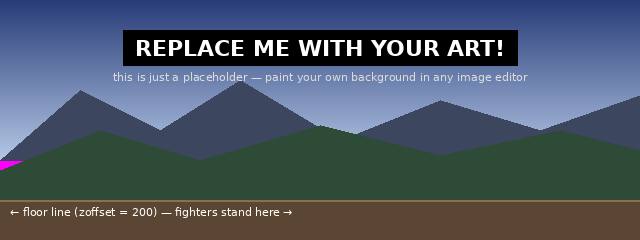
my-first-stage-bg.png, a placeholder background to replace later
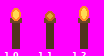
my-first-stage-torch.png, a 3-frame animated torch sprite sheet
Make a new folder anywhere on your computer (Desktop is fine) and unzip the pack into it. Open my-first-stage.def in Notepad (or VS Code if you have it) and just have a quick look. Don't worry about understanding it yet, we'll go through every section in Step 4.
Why a starter pack? MUGEN files are very particular about formatting, one missing comma and the whole stage breaks. Starting from a working file means you can always "delete and try again" if something goes wrong.
Don't double-click the .def file, Windows might try to open it with the wrong program. Right-click → Open with → Notepad.
🔢Put the Steps in Order+15 XP
Click items in the correct order to open the starter file:
Choose Open with > Notepad
Unzip the starter pack into a folder
Find [Info] and change the author name
Right-click my-first-stage.def
🧠Knowledge Check+15 XP
Why should you right-click and Open With Notepad instead of double-clicking the .def file?
AIt runs faster
BWindows might open it with the wrong program
CNotepad is the only program that can read it
3
🖼️
Pack Your SFF
Use Fighter Factory 3 to bundle your sprites into an .sff file.
Locked
MUGEN doesn't read PNG files directly. It reads .sff files, a special format that bundles many sprites together with ID numbers attached. We use Fighter Factory 3 (free, included in the workshop downloads) to create them.
The plan: two pictures, two ID numbers.
File
Group
Image
What it is
my-first-stage-bg.png
0
0
Background
torch frame 1
1
0
Torch (bright)
torch frame 2
1
1
Torch (dim)
torch frame 3
1
2
Torch (bright)
Step by step in Fighter Factory 3:
Open Fighter Factory 3 → File → New → Stage
Click the Sprites tab on the left
Click Add and select my-first-stage-bg.png
In the Group/Image fields at the bottom, set Group = 0, Image = 0
Repeat for each torch frame: Group = 1, Image = 0, 1, 2 in turn
File → Save As → save as my-first-stage.sff in the same folder as your .def
The torch sprite sheet has all 3 frames in one PNG. You can either cut them apart in any image editor first, or use FF3's sprite splitter.
The pink colour (#FF00FF magenta) in the placeholder isn't a mistake, MUGEN treats that exact pink as transparent. Don't replace the magenta with white or your torch will have a white box around it.
⚡True or False?+15 XP
MUGEN reads PNG files directly
An .sff file bundles multiple sprites with ID numbers
The pink colour #FF00FF is treated as transparent by MUGEN
🧠Knowledge Check+15 XP
What Group and Image numbers would you assign to the background sprite?
AGroup 1, Image 1
BGroup 0, Image 0
CGroup 10, Image 0
4
📄
Read the .DEF
Understand every section of your stage config file.
Locked
Let's walk through the most important sections of my-first-stage.def. Open the file in Notepad and follow along, each block does one specific job.
1. The name on the stage select screen.
[Info]name = "My First Stage"; >>> EDIT ME <<<displayname = "My First Stage"author = "Your Name"
2. The camera bounds, how far it can scroll.
[Camera]boundleft = -250 ; how far the camera scrolls LEFTboundright = 250 ; ...and RIGHTboundhigh = -100 ; ...and UP
3. Where the fighters spawn.
[PlayerInfo]p1startx = -70 ; Player 1 starts 70px LEFT of centrep2startx = 70 ; Player 2 starts 70px RIGHT of centre
4. Where the floor is.
[StageInfo]zoffset = 200 ; FLOOR is 200 pixels down from the toplocalcoord = 320, 240 ; the "virtual" screen size
Anything starting with a semicolon (;) is a comment. MUGEN ignores it. Use comments to leave yourself notes, your future self will thank you.
💻Fill in the Code+20 XP
Fill in the camera boundary values from the .def file:
Hint: look at the [Camera] section above, the values are right there!
🧠Knowledge Check+15 XP
What does a semicolon (;) at the start of a line mean in a .DEF file?
AIt's an error
BIt marks a section header
CIt's a comment that MUGEN ignores
5
🎚️
Layers & Delta
Master the parallax trick that makes 2D stages feel 3D.
Locked
Now the fun bit. Each [BG ...] block in your .def is one layer of artwork. The most important setting on every layer is delta, it controls how fast that layer scrolls when fighters walk.
delta = 0, 0, doesn't move at all. Use for the sky.
delta = 0.5, 0.5, half speed. Use for distant mountains.
delta = 1, 1, exactly matches the camera. Use for the floor.
delta = 1.5, 1.5, faster than the camera. Use for foreground objects.
delta 0.1, sky
delta 0.5, mountains
delta 1.0, floor
delta 1.5, foreground
0
Drag the slider above to "walk" the camera left and right. Notice how the sky barely budges and the foreground races past, that's parallax!
Here's the actual code for the background layer in your starter file:
[BG Background]type = normal
spriteno = 0, 0 ; Group 0, Image 0start = 0, 0 ; >>> EDIT ME <<<delta = 0.5, 0.5 ; >>> EDIT ME <<<mask = 0
tile = 0, 0
✏️Fill in the Blanks+15 XP
A delta of means the layer doesn't move at all (good for the sky). A delta of means it matches the camera exactly (good for the floor).
🧠Knowledge Check+15 XP
If you want a mountain layer to feel far away, what delta would you use?
Adelta = 1.5, 1.5
Bdelta = 0.2, 0.2
Cdelta = 2, 2
6
🔥
Animate a Torch
Bring your stage to life with a flickering animated layer.
Locked
Static backgrounds are fine, but a flickering torch makes a stage feel alive. To animate something, we use type = anim instead of type = normal, and point it at an action defined further down in the file.
Inside MUGEN/stages/, create a new folder called myfirststage
Move your my-first-stage.def and my-first-stage.sff into that folder
Open MUGEN/data/select.def in Notepad. Scroll down to [ExtraStages] and add a new line:
stages/myfirststage/my-first-stage.def
Save. Run mugen.exe, pick VS mode, and your stage will appear in the stage select screen!
If something's wrong, and it usually is the first time, here's the troubleshooting cheat sheet:
Symptom
What to check
MUGEN crashes on launch
Typo in select.def. Make sure the path is exactly stages/myfirststage/my-first-stage.def
Black screen in the stage
Your .sff isn't in the same folder as the .def, or the spr = line at the top points to the wrong filename
Pink box around the torch
mask = 0 on the animated layer, change it to mask = 1
Fighters floating in mid-air
Adjust zoffset in [StageInfo], try 200, 220, 240 until they touch the floor
Stage doesn't appear in select
Did you save select.def? It catches everyone the first time
Now make it yours. Open the placeholder PNG in any paint program, replace it with a real background you've drawn, repack the .sff, and reload. That's the entire creative loop, and it never stops being fun.
🔢Put the Import Steps in Order+15 XP
Click items in the correct order:
Add the stage path to select.def under [ExtraStages]
Create a folder called myfirststage inside MUGEN/stages/
Run mugen.exe and pick VS mode
Move your .def and .sff files into that folder
🧠Knowledge Check+15 XP
Your stage shows a black screen. What's the most likely cause?
AThe camera bounds are too small
BThe .sff file isn't in the same folder as the .def
CYou forgot to add a torch
🎆🏆🎆
Stage Complete!
You built your first MUGEN stage from scratch, background, animation, delta layers and all. You're officially a MUGEN stage creator!
Download the three starter files and follow along with the lesson. Replace the placeholders with your own art whenever you're ready.
📄.DEF File
my-first-stage.def
Fully-commented stage config with one background layer and one animated layer. Every section is explained in plain English. >>> EDIT ME <<< markers show exactly where to play.
Use these free browser tools alongside this workshop to create custom sprites, sounds, levels and colour schemes for your game. No installs. Free forever.